Category Archives: Arduino

Arduino based Temperature and Humidity/Humidex meter with DHT22 sensor and color LCD

IMG_1980

This project consist of Arduino board, serial TFT LCD 128×160 display, DHT22 sensor and obviously bread board and jumpwires.

Project features:

Continue reading

Reading temperature from LM92 digital sensor with Arduino

IMG_1416

LM92 is digital temperature sensor manufactured by Texas Instruments. It stands out with maximum +/- 0.33° C accuracy (at 30° C) and thermostat functions with hardware output and I²C interface.

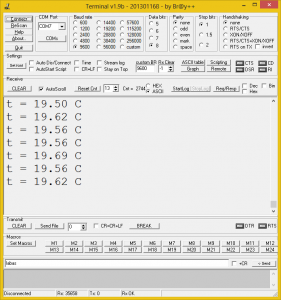
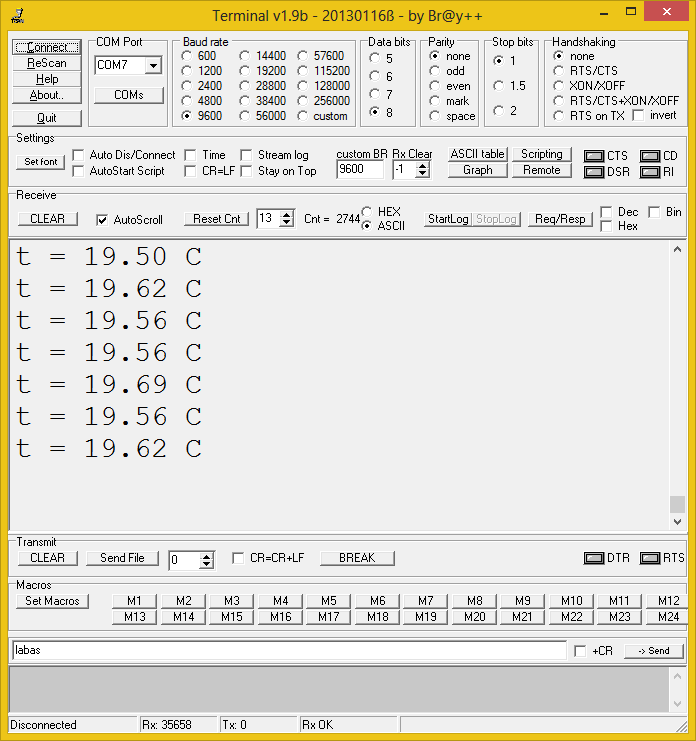
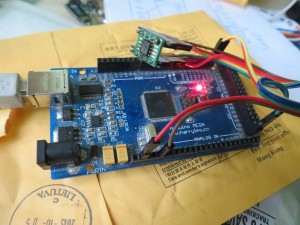
Continuous LM92 temperature reading.

I’ll show you how to just read  temperature while ignoring other LM92 capabilities.

lm92schematic

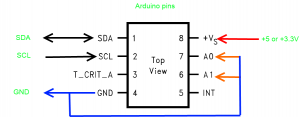
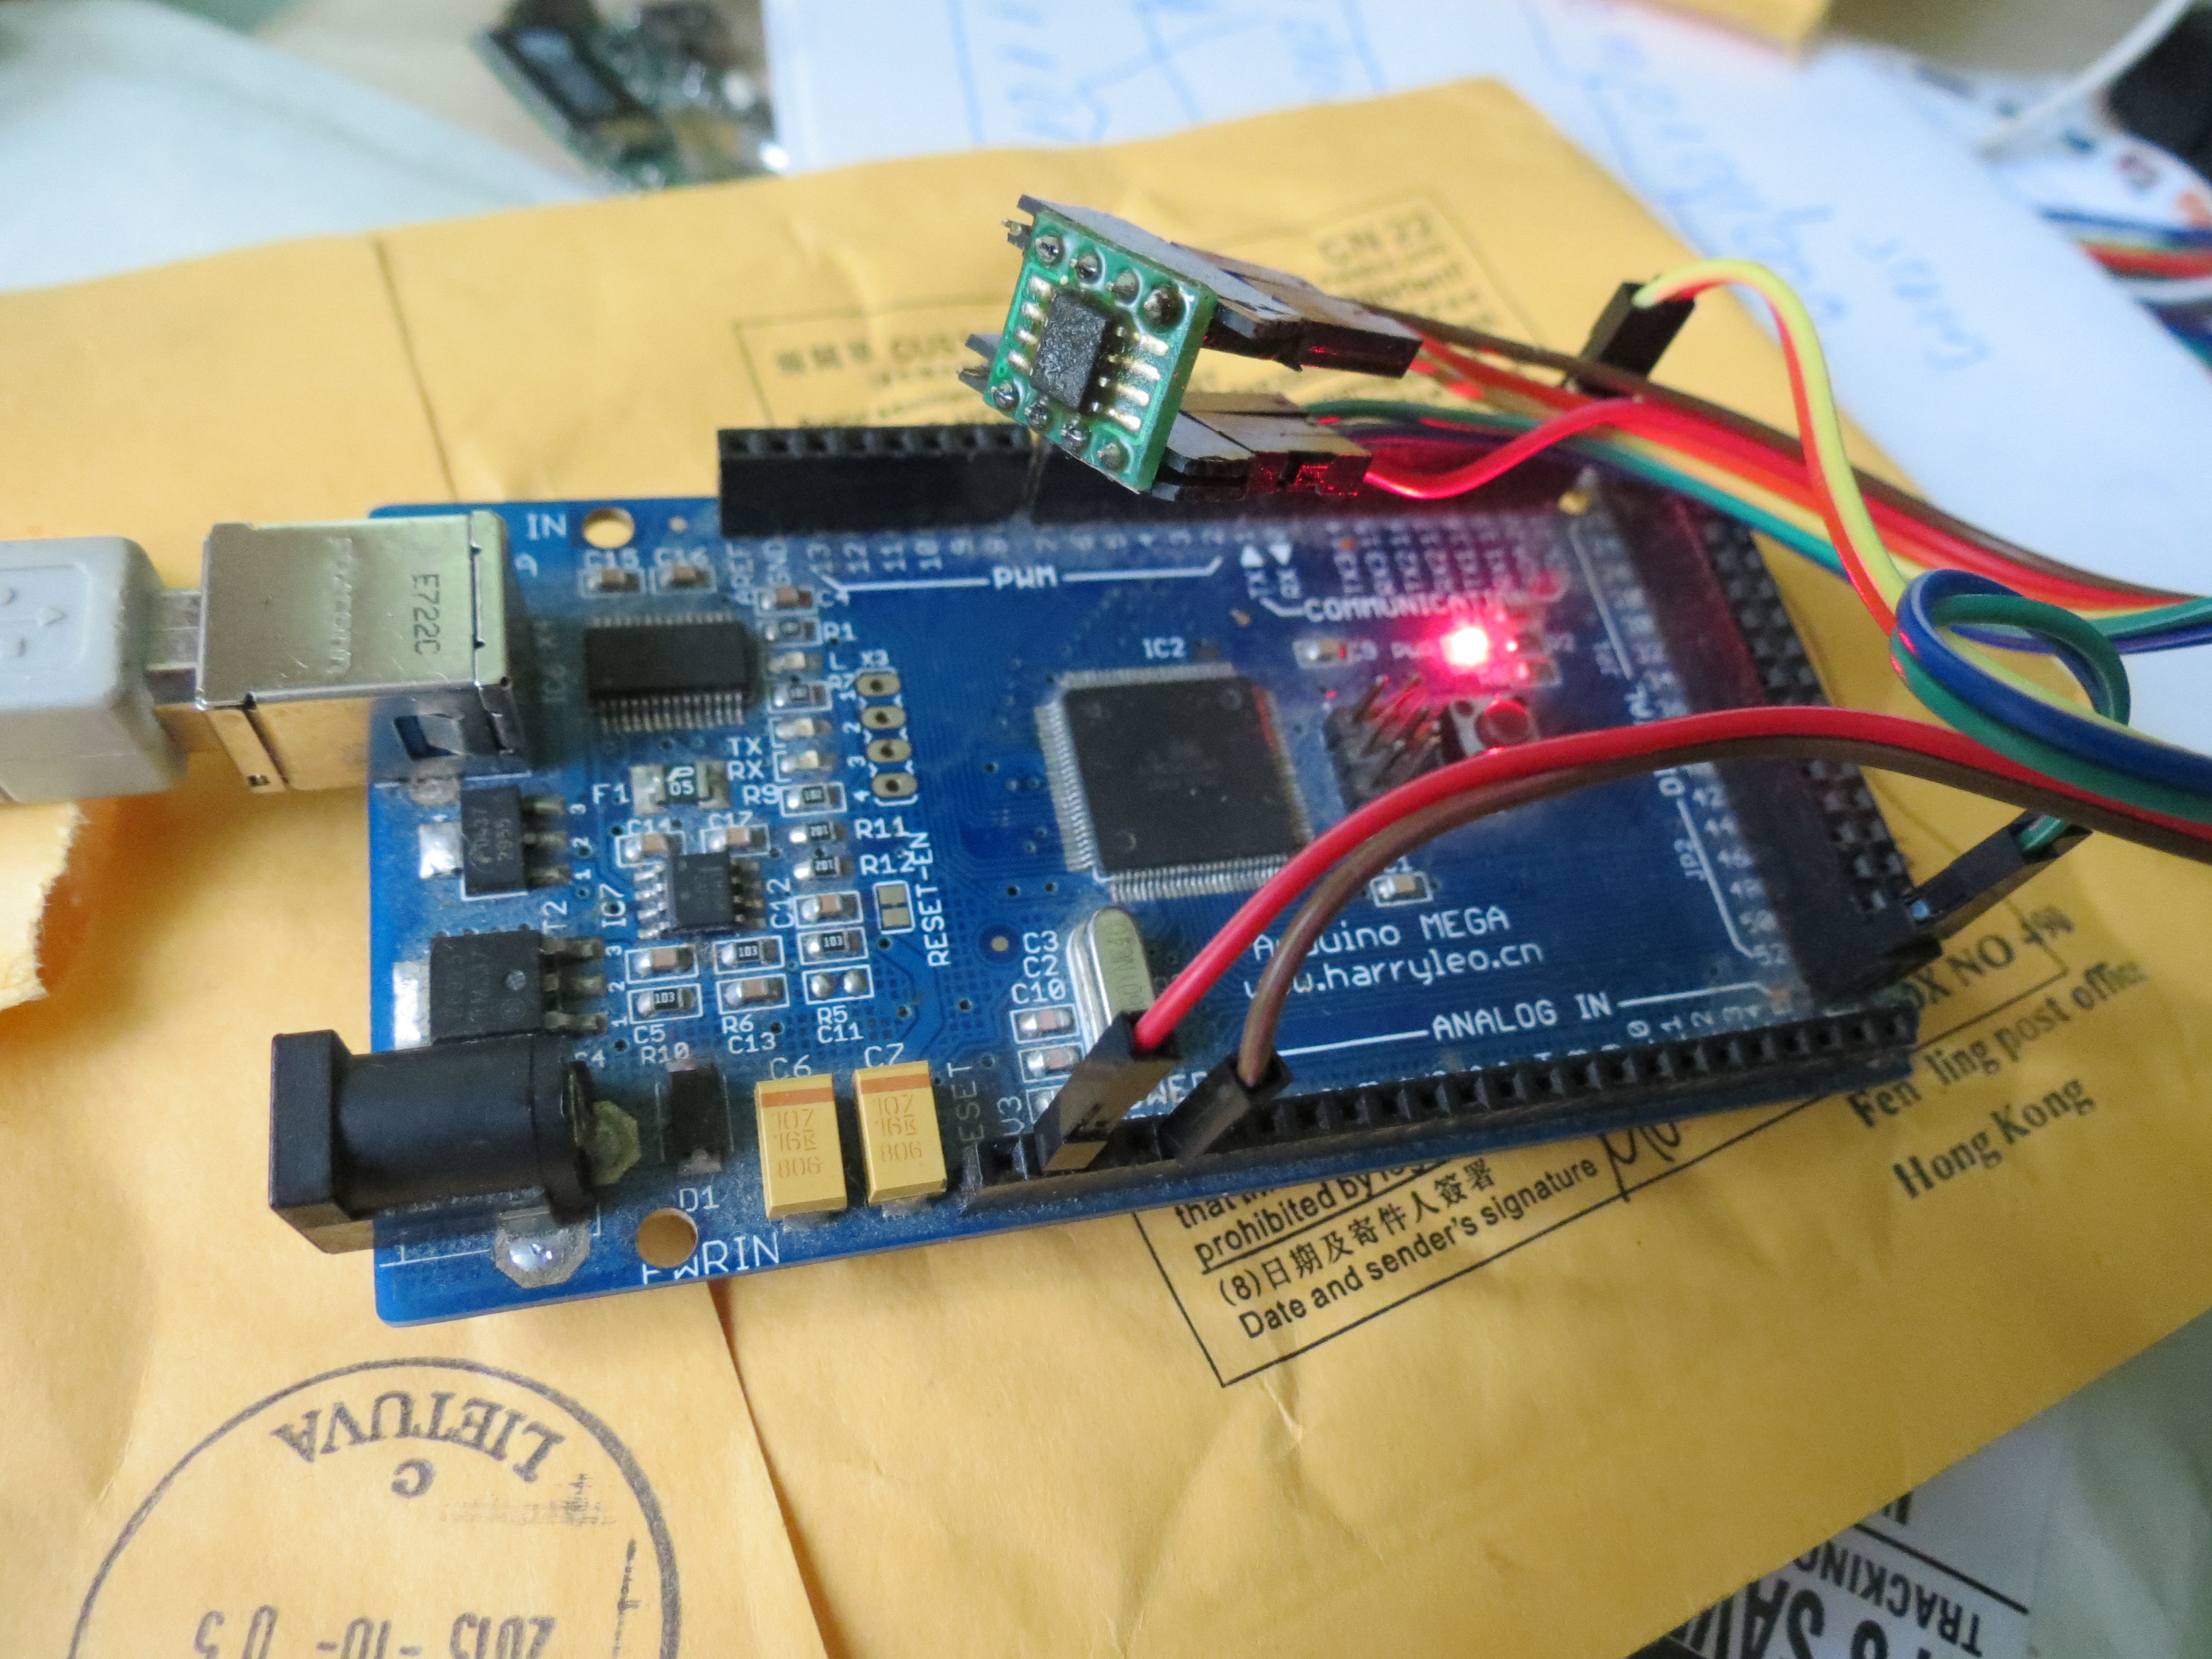
A0 and A1 pins define LM92 address for communication, by connecting pins to GND or Vss you get 4 address combinations so you can connect 4 LM92 sensors to one I²C bus. If you are planning to use only one sensor per bus just ground A0, A1 as it is shown in wiring diagram.

Other wiring is standard, although manufacture recommends 0.1 µF bypass capacitor if sensor is not near CPU.

LM92 have 7 bit slave address. Five most significant bits are “10010”. 2 least significant bits are set by A0 A1 pins. If they are connected to the ground 7 bit address is 100 1000 – 64 +8 = 72 or 0x48 (hex).

slaveaddress

char lm92address = 0x48; //A1 A0 are grounded

I²C communication is quite simple, Arduino invoke communication by sending correct LM92 address and reading 2 bytes containing temperature data.

Wire.requestFrom(lm92address,2);

if (Wire.available())

{
for (int i=0; i<2; i++) {

buffer[i]= Wire.read();
}

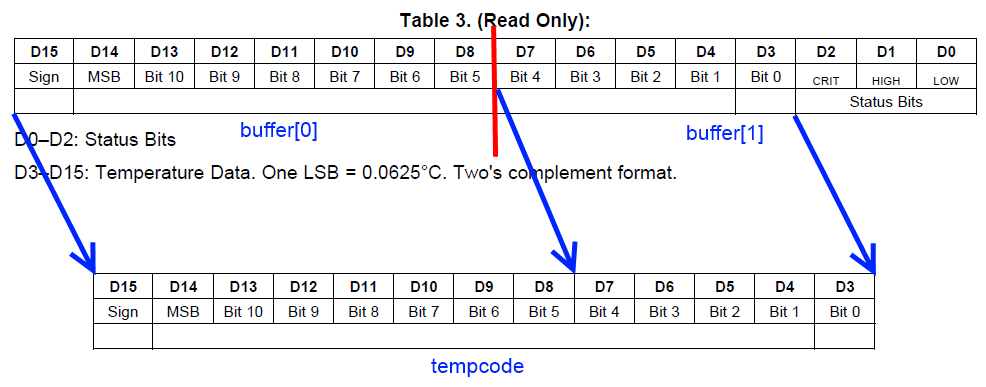
From received 16 bit temperatures register content is formated 12 bit temperature code.

tempcode

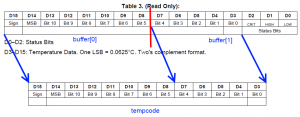
And converted to Celsius.

tempcode= ((buffer[0] << 8) + buffer[1]) >>3;
temp = tempcode * 0.0625;

Temperature from LM92 can be read at any time, but if temperature conversation is in progress reading interrupts it and it starts from beginning after reading is finished. Therefore if read request is to frequent temperature conversation never finishes. Temperature conversation time is 500 ms, so there is 500 ms delay to protect from reading to frequent.

delay(500);

Full code:

//Reading LM92. electronicsblog.net
#include <Wire.h>
#include <Serial.h>

char lm92address = 0x48; //A1 A0 are grounded
char buffer[2];
int tempcode;
float temp;

void setup() {
Wire.begin();
Serial.begin(9600);
}

void loop() {

Wire.requestFrom(lm92address,2);

if (Wire.available())

{
for (int i=0; i<2; i++) {

buffer[i]= Wire.read();
}

tempcode= ((buffer[0] << 8) + buffer[1]) >>3;
temp = tempcode * 0.0625;

Serial.print("t = ");
Serial.print(temp);
Serial.print(" C");
Serial.println();
}
delay(500);

}

terminal

Very simple Arduino Lithium-ion battery capacity tester/discharge monitor

This is a very simple capacity tester. It consists of single resistor that discharges battery. Arduino measures the voltage drop across resistor. According to Ohm’s Law current = voltage/resistance. Every second value of current is divided by 3600 and summed up to get the capacity expressed in Ah (Amp per hour).

I have used two parallel connected resistors that total resistance is 6.9 ohm. Make sure that they have proper power rating, if You don’t want them to convert to smoke. If voltage across 6.9 ohm resistor is  3.7 V, then current – 0.54 A, power ~ 2W.

Continue reading

Arduino and ultra sonic range measurement module or how to measure the pulse time with a hardware timer and an interrupt

SEN136B5B is a Ultra Sonic range measurement from SeedStudio. It can measure the distance by sending a 40k Hz ultra sound impulse via the transmitter  and calculating time needed for echo to reach receiver. Detecting range: 3cm-4m. More information about device.

In the description of module is mentioned that it is compatible with Arduino library, but I decided to write program without using PulseIn command.

Continue reading

Simple angle meter using ADXL335 accelerometer [Arduino]

ADXL335

ADXL335 is 3 axis accelerometer with analog output from Analog Devices. You can buy it as an evaluation kit  with standard 2,5 mm connector.

ADXL335 acceleration measurement range is +/- 3 g. Supply voltage is 1.8 –  3.6 V, however all specifications at the datasheet is given at 3.0 V. This accelerometer has  3 outputs for X,Y,Z axis which voltage is proportional to acceleration on specific axis.

At midpoint when acceleration is 0 g output is typically 1/2 of supply voltage. If a supply voltage is 3V, then output is 1.5 V. Output sensitivity typically is 300 mV/g.

Continue reading