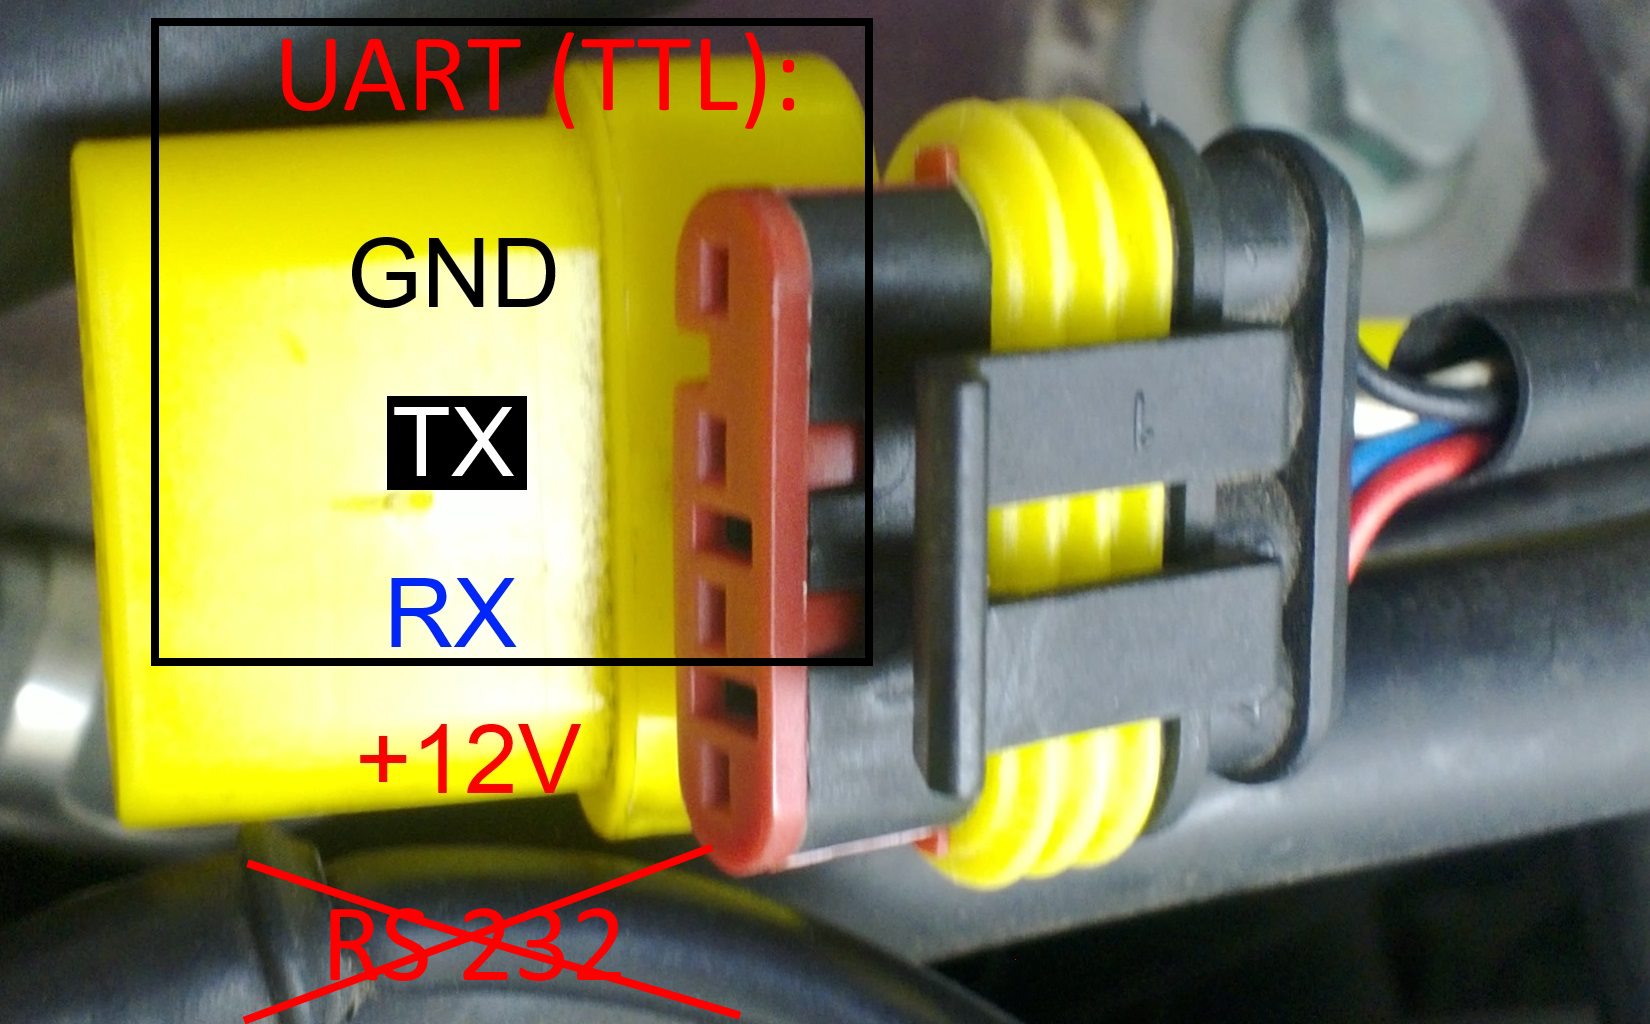
Stag gas controllers have 4 pin socket for diagnostic purposes. AcGasSynchro software can be downloaded free, but you need cable/adapter to connect USB port of a computer to this special socket. If you don’t plan running automotive businesses and just curious to play with diagnostics software once or twice is not worth to buy a special cable for about 30 USD.
Good news that Stag gas controller use standard UART TTL level interface. So you need just easy findable USB – UART converter. Connect RX<->TX, TX<->RX, GND <-> GND, that is all.
You need a converter to UART TTL level (0/5V ), not to RS-232(-13/+13V). The RS-232 converter can permanently damage your diagnostics port and/or gas computer.
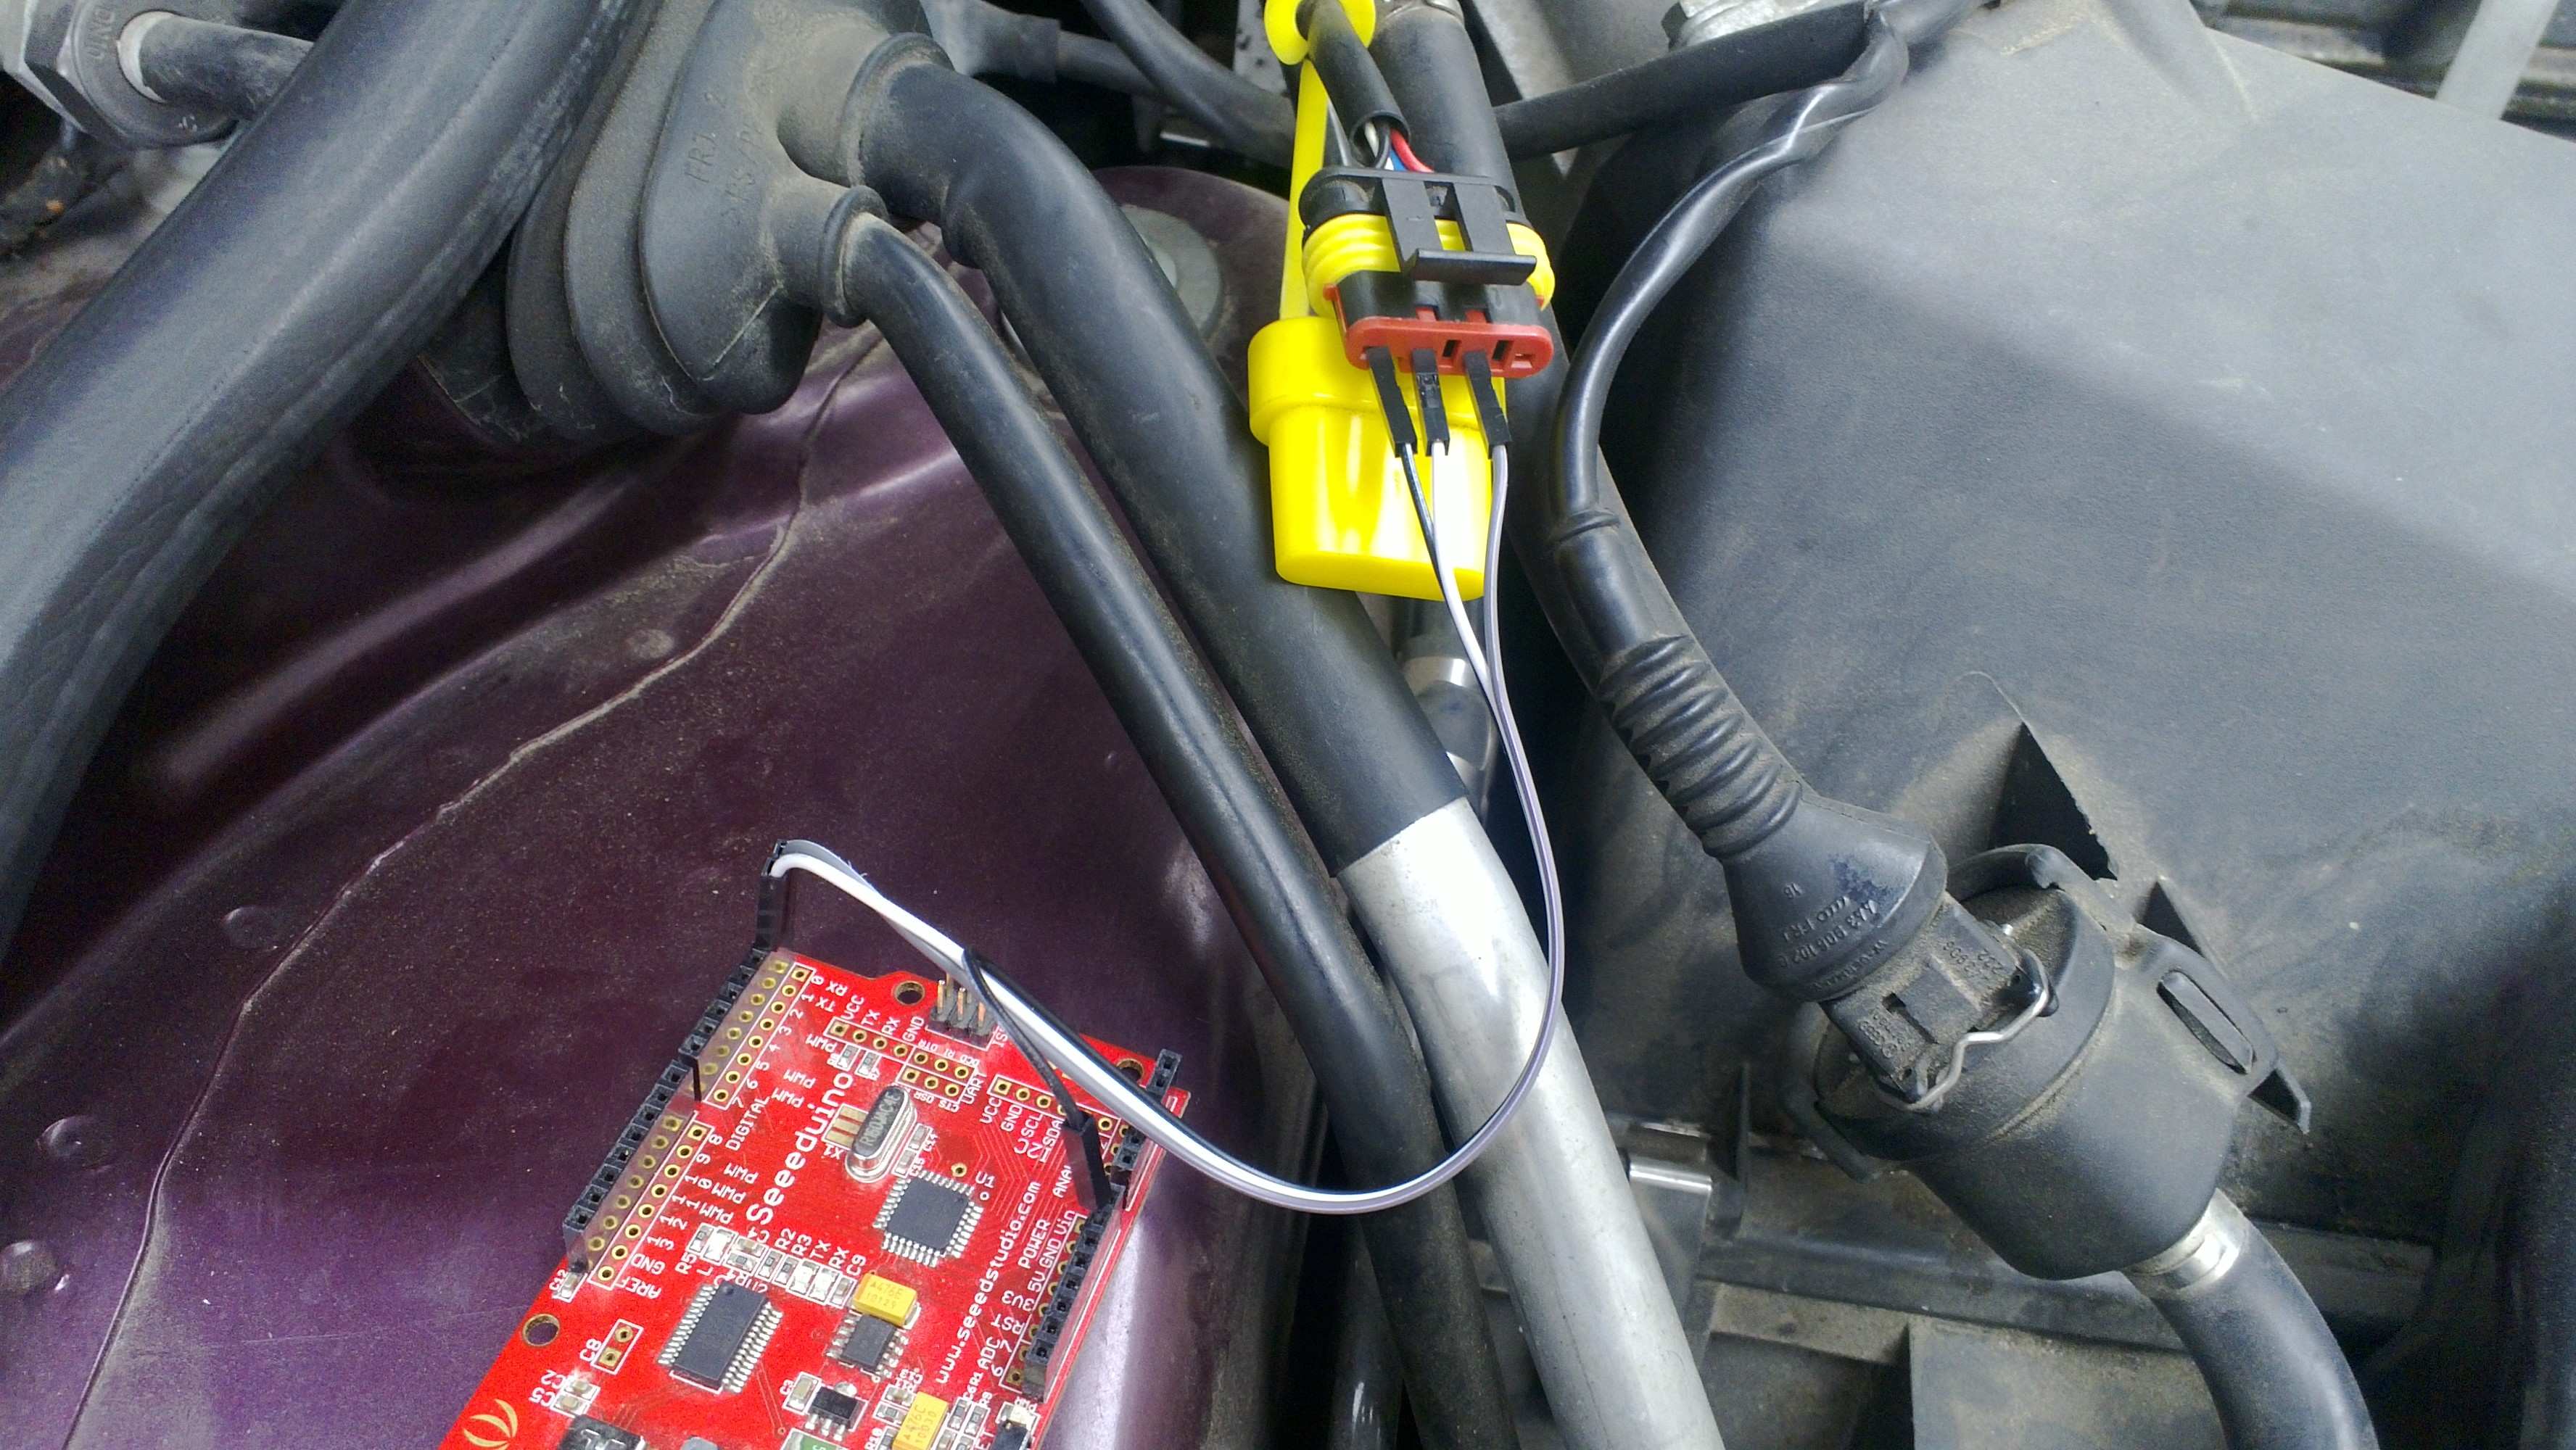
I prefer to use Arduino board because it also has integrated USB – UART converter and You don’t need to write any code, just load example “blink” project to make sure that Arduino RX, TX ports won’t interfere. You need to connect RX<->RX, TX<->TX, GND <-> GND. Don’t connect +12V wire to anything.
Connect Arduino board or USB -UART converter with USB cable to a computer, turn on ignition and start AcGasSynchro software.
You can turn off ignition after few second because diagnostic interface works without ignition, but goes sleep after several minutes without ignitions is turned off.
Go Port – Connect.

Software should find proper COM port what is associated with USB – UART converter and connect. If it fails to connect check if you didn’t mix up RX and TX connections, and ignition is on.
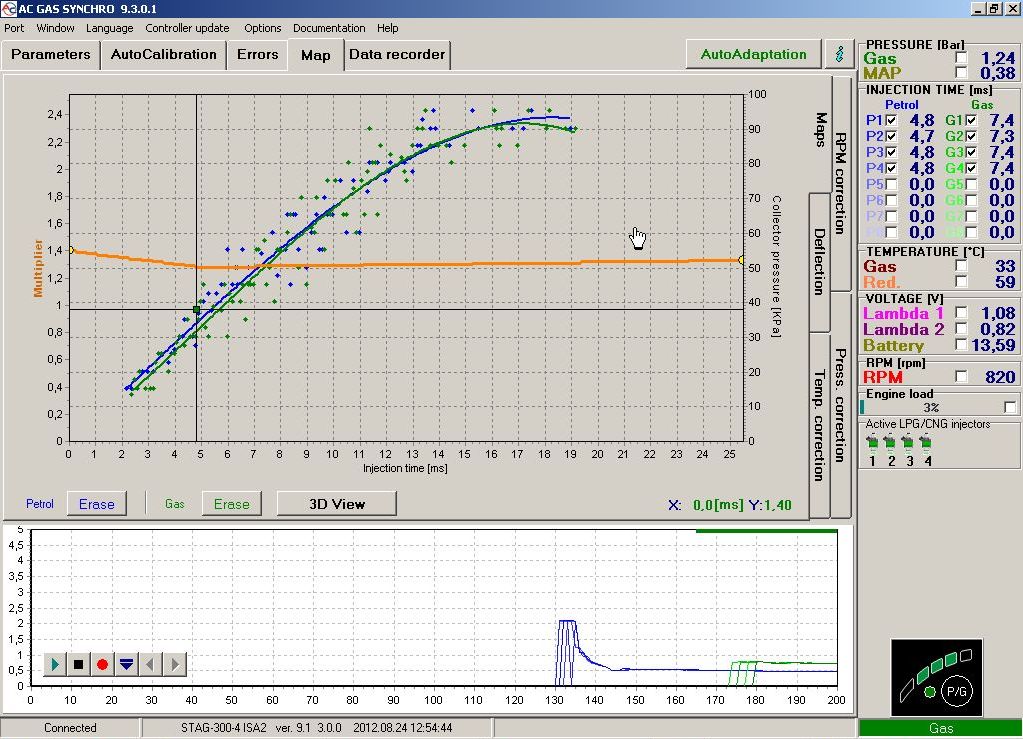
Now you are on your own, just remember that controller tracks logins and changes, so you can void your warranty.
You could make electric connection less messy buy using SuperSeal plug.
